Showing posts with label influxdb. Show all posts
Showing posts with label influxdb. Show all posts
Saturday, 26 December 2020

Wednesday, 23 December 2020
Home Automation System - OpenHAB v. 3 - 06. Dashboard with Grafana and InfluxDB
This blog is no longer updated.
To read this post please visit
Sunday, 20 December 2020
Home Automation System - OpenHAB v. 3 - 05. Persistence with InfluxDB
This blog is no longer updated.
To read this post please visit
Thursday, 17 December 2020
Home Automation System - OpenHAB v. 3 - 04. InfluxDB-Docker Get Started
This blog is no longer updated.
To read this post please visit
Thursday, 16 November 2017
Home Automation System - Dashboards with Grafana

I chose InfluxDB as persistence engine in OpenHAB also because it is easy to integrate with Grafana, an open source visualization suite that let us build interactive web dashboards.
I installed Grafana on my Raspberry PI3, where already run OpenHAB and InfluxDB, using the Openhabian configuration tool (openhabian-config), choosing "optional components".

Then, I'm able to reach the suite through http on port 3000.
Here you can find a very good guide about Grafana and InfluxDB setup and configuration
https://community.openhab.org/t/influxdb-grafana-persistence-and-graphing/13761#grafana-setup
The process to build dashboards is very easy...as long as you define your InfluxDB data source.

Every dashboard is a set of rows and objects; to fetch your data you have to choose among all the measurements in InfluxDB...
Here is my example dashboard where I put:
- at top left, ping time of my local network devices;
- at top right, speedtest results;
- at bottom, weather data, fetched from the OpenWeatherMap service

Monday, 6 November 2017
Home Automation System - Openhab persistence service with InfluxDB

In the last few days I studied the "persistence" service in OpenHAB v.2, just to store acquired data and be ready to create dashboards.
As usual, official docs are the best choice:
I chose InfluxDB as persistence service, a time series database, easy to integrate in Grafana, a web platform for dashboards creation.
The first thing to do is to install InfluxDB on the RPI3 (the same where OpenHAB is already running) following the official documentation https://docs.influxdata.com/influxdb/v1.3/introduction/installation/
Next, I have to enable the persistence service on OpenHAB v.2, using PaperUI, Add-ons section, Persistence tab

Then, OpenHAB must be configured with the InfluxDB connection info, editing services/influxdb.cfg file in the usual OpenHAB configuration folder. In my case, I used all the default options, so I just entered the password.
This is my configuration file:
# Defaults to: http://127.0.0.1:8086
# url=http(s)://<host>:<port>
# The name of the database user, e.g. openhab.
# Defaults to: openhab
# user=<user>
# The password of the database user.
password=XXXXXXX
# The name of the database, e.g. openhab.
# Defaults to: openhab
# db=<database>
On the official guide you can find all the options: http://docs.openhab.org/addons/persistence/influxdb/readme.html
Now it's time to build the persistence strategy to let OpenHAB knows how store data on InfluxDB; in a few words I have to decided, item for item, when datas will be stored on db. I can choose between many options: on every change, on every update or by time schedule, using Quartz syntax. To do so, I created a new configuration file in the /etc/openhab2/persistence folder, called influxdb.persist. In this file I defined which kind of persistence strategy I will use (Strategies section...) and assigned them to items and groups (Items section).
Official docs:
My Strategies section is as follow:
everyMinute: "0 * * * * ?"
everyHour: "0 0 * * * ?"
everyDay: "0 0 0 * * ?"
default = everyUpdate, restoreOnStartup
}
I used groups to assign the persistence strategies to items; so I defined new groups in /etc/items/groups.items file
Group gPersistence1m (gAll)
Group gPersistence1h (gAll)
Group gPersistence1d (gAll)
Group gPersistenceChange (gAll)
then I'll assign them the persistence strategy just defined in the Items section of the influxdb.persist file
gPersistence* :
gPersistence1d* : strategy = everyDay, restoreOnStartup
gPersistence1h* : strategy = everyHour, restoreOnStartup
gPersistence1m* : strategy = everyMinute, restoreOnStartup
gPersistenceChange* : strategy = everyChange, restoreOnStartup
.........
}
I will easily assign these groups to items to assign a particular persistence strategy
In the next post I will speak about Grafana, a powerful tool to build dashboard.
Saturday, 5 August 2017
Home Automation System - OpenHAB 2 on Raspberry PI 3
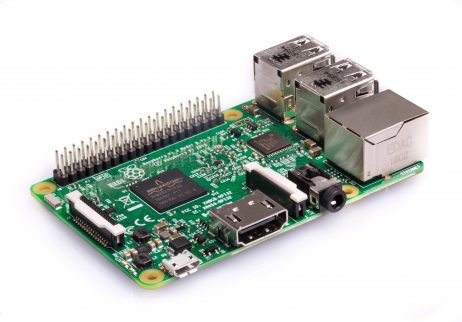

My target is to install OpenHAB v.2 and all related services on my brand new Raspberry PI 3; reading the official documentation (http://docs.openhab.org/installation/openhabian.html), I discovered OpenHABianPI, a custom operating system based on Raspian Lite, but optimized for OpenHAB. So I flashed on SD-CARD, with Etcher, a complete pre-configured image, downloaded from https://github.com/openhab/openhabian/releases. Then I plugged the SD-Card in the Raspberry slot and power it up, after connected a LAN cable (there is also a procedure to connect the raspberry direct to WiFi...http://docs.openhab.org/installation/openhabian.html#wifi-setup). The setup of OpenHABianPI automatically starts during boot and you can follow it through SSH. In about ten minutes the system will be ready.
The first thing to do is run the openhabian-config tool, which will let us to setup the complete system.
sudo openhabian-config

01 - Update and 02 - Upgrade System will keep the system updated and you will run them frequently.
Then...
- 10 - Apply Improvements ==> run all the submenù
- 20 - Optional Components ==> 21 - Log Viewer, 22 - Mosquitto (the MQTT broker) and 23 - Grafana (not mandatory but it's a very nice dashboard tool)
- 30 - System config ==> all optional except 34 - Change Passwords which will secure your system; 37 - Move root to USB; is a very useful choice...it lets you to use an external USB Hard disk, instead of SD Card. I configured both my raspberries in this way, but I followed a manual procedure (see https://www.raspberrypi.org/forums/viewtopic.php?f=29&t=44177&hilit=usb+stick+operating+system)
- 40 - openHAB related ==> 43 - Reverse Proxy very useful option to expose OpenHAB system on the internet and access it from everywhere; it will configure NGINX as SSL reverse proxy - pay attention that with this option your system will be exposed to internet and so if not well secured could permit to everyone to take control of your home devices.
Ok, OpenHAB is ready to use. I suggest you to take a look at the official documentation, tutorials and forum on the OpenHAB website http://docs.openhab.org/ https://community.openhab.org
The official youtube channel is https://www.youtube.com/channel/UC7OK88DW0La_BJlcXZg8ydQ/feed
Just another useful info: OpenHAB could use a lot of services to persist data; one of these services uses InfluxDB, a NOSQL database. It lets OpenHAB to store historical data series which could be displayed as charts or tables. Grafana, the open source dashboard tool, is perfectly integrated with InfluxDB. You could also use the standard MYSQL RDBMS as a persistence service. I will use InfluxDB, and so I will install it on the same raspberry as openHAB (see https://docs.influxdata.com/influxdb/v1.3/introduction/installation/)
Let's summarize my system:
- OpenHAB v 2.1
- Mosquitto MQTT Broker, with authentication
- Grafana
- InfluxDB, as OpenHAB persistence service
- Reverse proxy SSL with authentication, through NGINX , to expose OpenHAB and Grafana on the internet, in a secure way
If you are not able to setup and mantain reverse proxy, NAT and port forwarding, you could use My OpenHAB service, which lets you to exposed on the internet a local OpenHAB installation; registration is required.
Ok, we are ready to use our Home Automation System

Subscribe to:
Posts (Atom)