Disclaimer

Please, proceed carefully following the tips published in this blog, specially when Main Power is involved. I'm not responsible for any damages caused by what is written in this blog.
Thank you
Showing posts with label wifi switch. Show all posts

Saturday, 1 September 2018

Home Automation System - SONOFF 4 Channel integration with OpenHAB


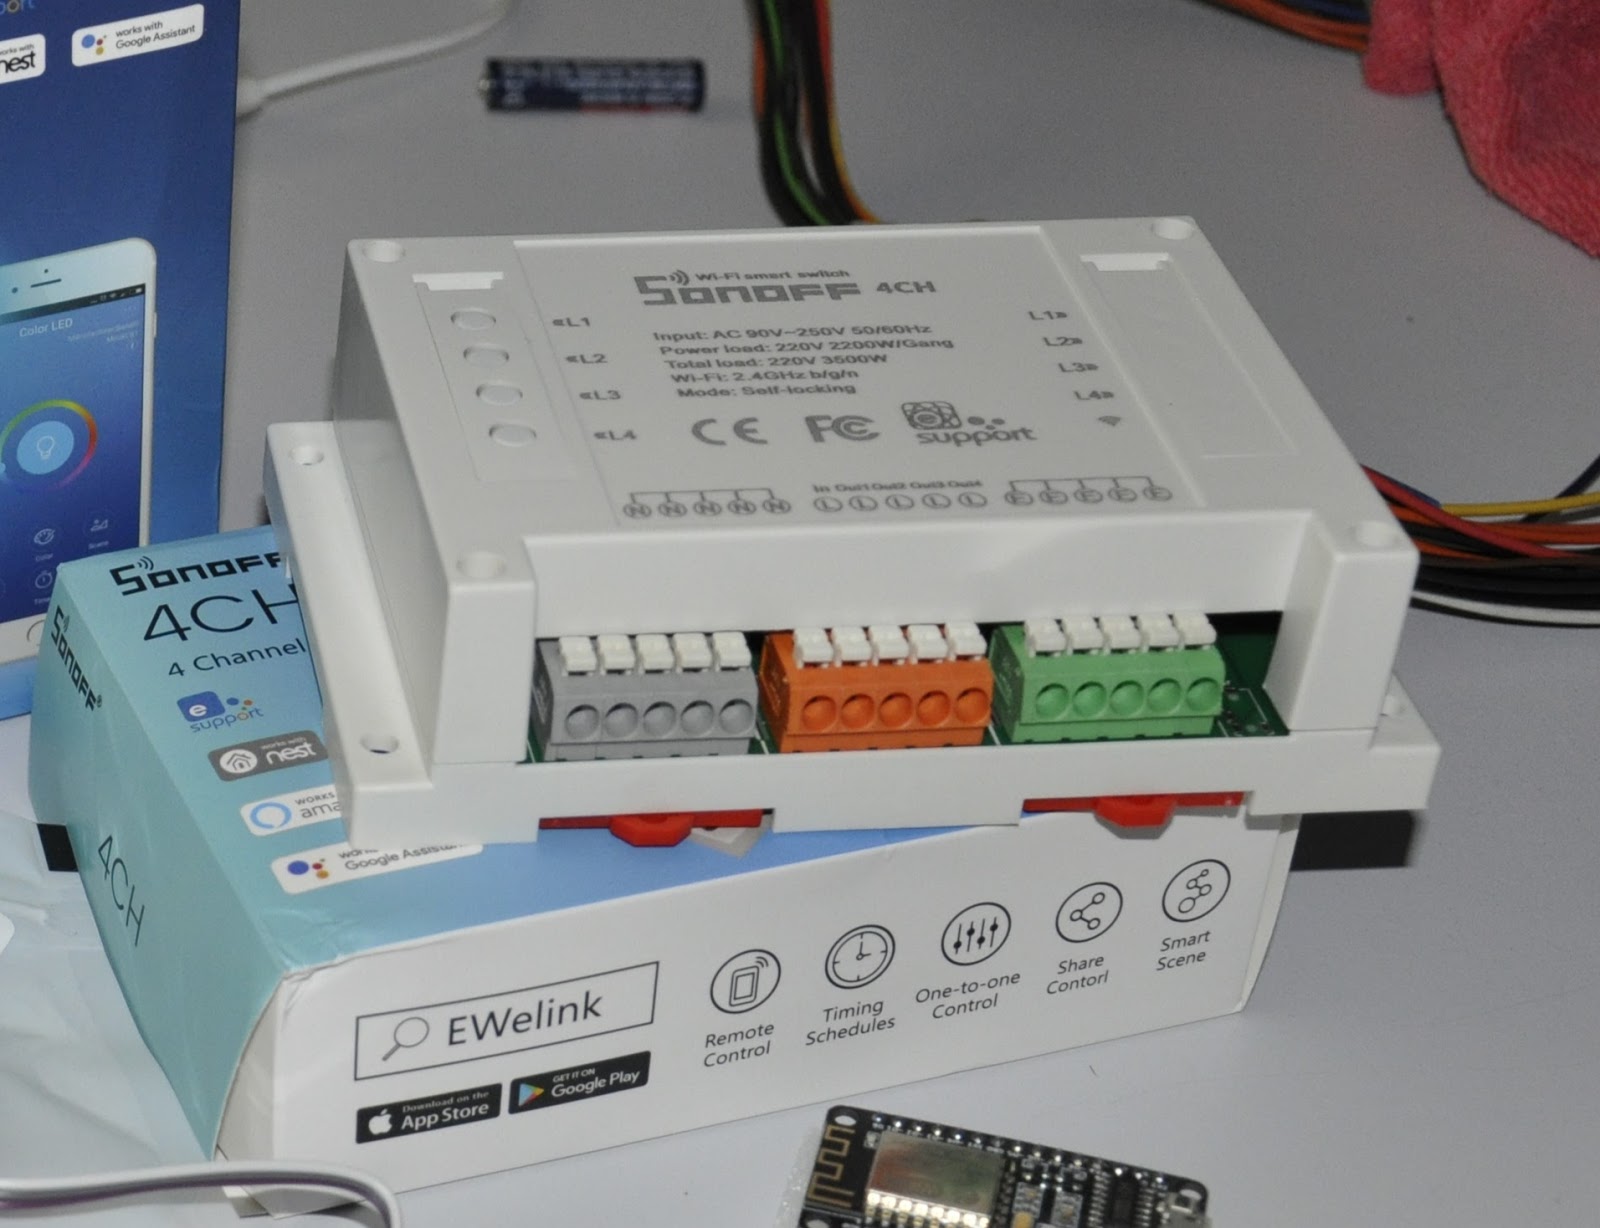
In the previous post, I spoke about my SONOFF 4 channel, describing the physical installation.

Now, this device will help me to drive 4 lights: 1 internal and 3 exterior; of course, OpenHAB will be my control system and MQTT will be the message protocol.

Let's go to setup the SONOFF, using its web interface


The first step will be to setup the module type, using the menĂ¹ Configuration -> Configure Module


Then, in Configuration -> Configure MQTT, we will put the MQTT topic, splitted in TOPIC and FULLTOPIC as TASMOTA ask


In my case the device will use the following topic smarthome/sonoff4ch14/###. TASMOTA will replace ### with the type of message it will be sending (for example cmnd for commands, state for status information etc etc)

No more details on the other configuration options...they are the same as the other SONOFF

Now it's time for OpenHAB...we will add 4 items, one for each light.

Create a new file, called sonoff4ch.items, in the usual folder /etc/openhab2/items; in the file we will write the items configuration:


As you can see, MQTT topic is the same for all items. Only one thing changes...the property name, indexed by a number to indicate the relay number.

Finally, the last step: put the 4 items into a sitemap. So, write down 4 switch into the sitemap file

(these are the 3 items for exterior lights...)

And here is my complete sitemap:


Now let's push some buttons and see what happens.


Friday, 17 August 2018

Home Automation System - SONOFF 4 Channel


Finally I found a little time to continue my Home Automation System.

I already own a SONOFF 4 channel...I think the biggest one...


This device is able to drive 4 power outputs through a single Wifi connection. I will use it to power up my lights.

As well as input and output power connector,s it also has 4 pushbuttons which drive the 4 relays. Basically it's like 4 SONOFF Basic in a single device and with a single Wifi connection.

As usual I will use the TASMOTA firmware instead of the original one, which permits to use the device only through EWelink software. With TASMOTA firmware I'm able to easily integrate the device in OpenHAB using MQTT protocol.

Here is my SONOFF in flashing mode


As usual, it's easy to flash the firmware...just follow the official Wiki

Please, remember that this is an irreversible operation. You cannot recover the original firmware

In order to be able to control the SONOFF also through a traditional button, I decided to use the 4 pushbuttons integrated in the device... by connecting them appropriately to the buttons / wall switches ...

I never throw anything away and in this case a male / female old serial cable will be very useful to connect comfortably and plug and play the buttons / wall switches with the SONOFF buttons.

Thanks to Piero, we soldered the serial pins to the 4 pushbuttons on the SONOFF


getting the connector out of the SONOFF box


On the other side, we have an ethernet cable linked to the wall buttons


and we soldered to it the male serial connector


Ok, now it's time to configure the device to be integrated in OpenHAB through MQTT

Stay tuned...

Sunday, 29 October 2017

Home Automation System - New mailbag...


Last Friday, a new mailbag arrived...full of new stuffs from China...


Among the others, we have:

- a SONOFF B1, wifi controlled RGB lamp;
- a SONOFF 4Ch, wifi controlled relays (4);
- some temperature and humidity sensors DHT11
- some RF433 wireless transmitter and receiver
- a couple of ESP8266 NodeMCU

Keep going on...

Saturday, 30 September 2017

Home Automation System - MQTT, SONOFF and OpenHAB v. 2


It's time to integrate MQTT and OpenHAB v.2.

As already said in a previous post (http://domoticsduino.blogspot.com/2017/08/home-automation-system-sonoff-and-mqtt_19.html), actually I have a SONOFF Basic already installed which drives a garden lamp. As we already know, it's already setup with MQTT and so let's start the OpenHAB integration.

I followed step by step the Tasmota wiki, in the integration section (https://github.com/arendst/Sonoff-Tasmota/wiki/openHAB) and so, as first step, I installed some ADDONS in OpenHAB:


Now I have to setup the MQTT connection to the MQTT broker which runs on the same Raspberry PI 3 as OpenHAB 2; so I have to edit the configuration file /etc/openhab2/config/mqtt.cfg directly through the linux shell (nano or vi) or using Eclipse SmartHome Designer, an advanced text editor optimized for OpenHAB v.2 configuration files. I used it. Its setup is very simple and then it needs to know the OpenHAB configuration files path. In my case I setup a network drive (called Z) for a samba share automatically defined by the installation of openHABianPI.

In particular, the configuration parameters I edited are the following ones:

openhabianpi-mqtt.url=tcp://localhost:1883
serve and port of the MQTT broker

openhabianpi-mqtt.clientId=openhabianpi
openHAB client Id for the MQTT connection

openhabianpi-mqtt.user=openhabian
Username for the MQTT connection

openhabianpi-mqtt.pwd=XXXXXXX
Password for the MQTT connection

openhabianpi-mqtt.retain=true
Defines if the broker should retain the messages sent to it

openhabianpi-mqtt is the logical name of the MQTT connection; in OpenHAB we could have many MQTT connections and in the items configuration we use this name as reference.

If you don't make mistakes, during the OpenHAB boot you may find log messages as following:


Ok, now I will configure items and the sitemap .

So, I created a file called sonoffbasic01.items in the folder /etc/openhab2/items in which I setup my new items.

I defined a "Switch" object ("light" category) which was linked to the full topic mqtt of the SONOFF Basic 01 tasmota/garden/light/%topic%/%prefix%/. Here is the syntax:

Switch Garden_Light_1Lamp "Garden 1-Lamp"      <light>
            (gLightSwitchGarden)
            {mqtt="
                     <[openhabianpi-mqtt:tasmota/garden/light/sonoffbasic01/stat/POWER:state:default],
                     <[openhabianpi- mqtt:tasmota/garden/light/sonoffbasic01/tele/STATE:state:JSONPATH($.POWER)],
                     >[openhabianpi-mqtt:tasmota/garden/light/sonoffbasic01/cmnd/power:command:*:default]"
             }

For info about syntax of .items files please see official documentation http://docs.openhab.org/configuration/items.html

In this way I created an item called Garden_Light_1Lamp linked to MQTT messages of topic defined in the {...} block

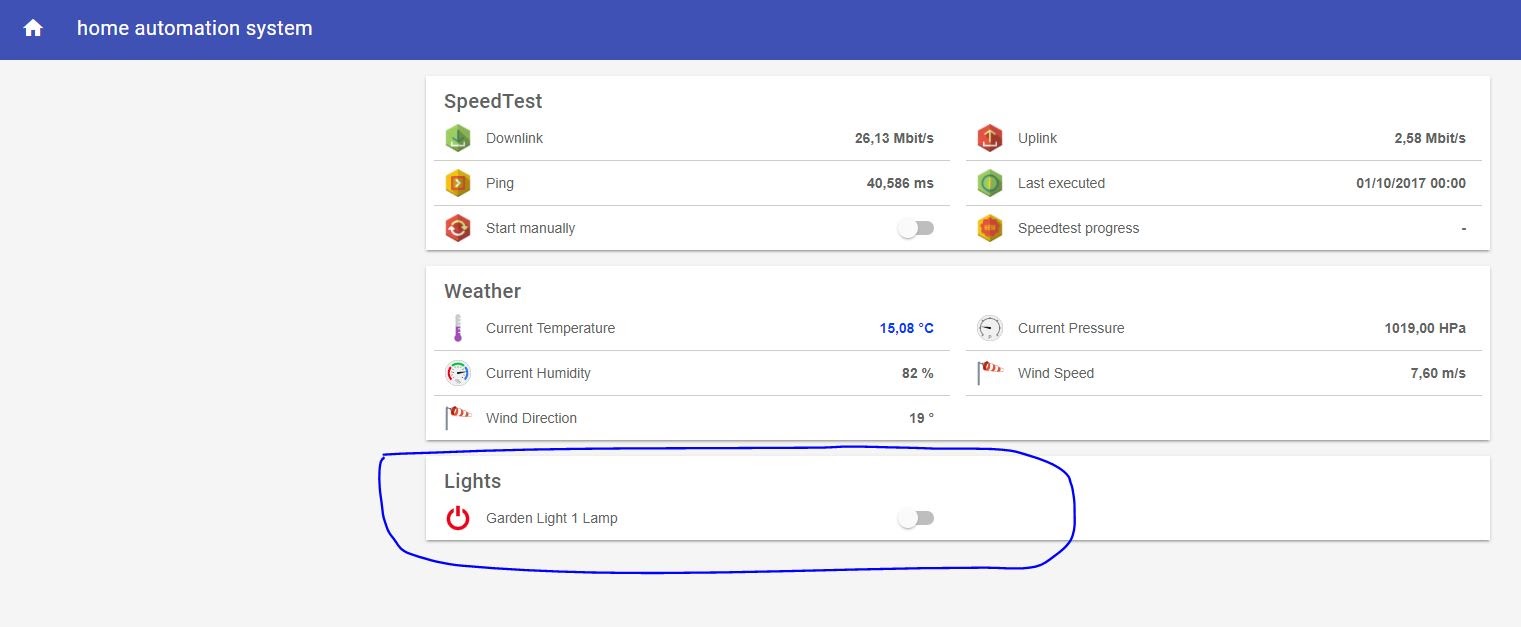
Then, I added this new item in my sitemap . So, I edited sitemap definition file, appending the following rows:

Frame label="Lights" {

Switch     item=Garden_Light_1Lamp        label="Garden Light 1 Lamp"       icon="switch"


}

After saved this file, OpenHAB updated the sitemap and the "lights" section appears


Here is a short video about my test:


Monday, 4 September 2017

Home Automation System - New items arrived...


During my configuration test, other "toys" arrived...

5 SONOFF Basic + a New Entry: 1 SONOFF Dual

The SONOFF DUAL is simply a double SONOFF basic: in fact it has two independent relays.

Here are my new toys, already labelled:


As usual, the first thing to do is test them with EWeLink, without open the case
The schematic is similar to the one of SONOFF POW; the terminal link are all on the same side 

There is no earth connection, but 3 pair of Phase / Neutral link, 1 for the INPUT Voltage and 2 for the OUTPUT.


Here is the activation procedure for my new SONOFF DUAL with EWeLink

Saturday, 19 August 2017

Home Automation System - SONOFF and MQTT together


I'm ready to test MQTT communication with my SONOFF Basic, also connected to a real button to light up my garden lamp.

I think it's important to be able to manage lights through standard buttons and switch, not only by Home Automation Software as openHAB and others, to avoid failures due to network problems.

So, I did another little hack to SONOFF: I soldered two little wire to its push button; these wires will be linked to a standard button on the wall.

Here are the wires connected to the button on the SONOFF


In this way, the standard button will activate the relays in the same way the button on the SONOFF or the APP will.

Last thing, to close the SONOFF with its case I have to make a little hole on the side to let the wires passing by:


Now, it's time to connect the SONOFF with the main power and link a standard button with the wires. In the INPUT pin I connected phase and neutral of the main power and in the OUTPUT pin I connected phase and neutral of the garden lamp.

Ok, after a little test all is working as expected. I pushed the button twice and lamp lighted up and down Thanks again to Piero who helped me to link the sonoff to the main power.

Now I can inspect the MQTT messages involved.

I use the web console, opening it through a internet browser, typing the ip address of the SONOFF in the address bar. Then, accessing the "Console" menĂ¹ I can take a look at the MQTT messages.


The first thing I noticed is the telemetry messages, sended by device about every 10 seconds (this timeout is managed by the TELEPERIOD parameter); the message content is a JSON string, which contains many informations (POWER, the state of the relay is the most interesting one for me in this moment); the MQTT topic is tasmota/garden/light/sonoffbasic01/tele/STATE, following what I wrote in a previous post (http://domoticsduino.blogspot.com/2017/08/home-automation-system-sonoff-and-mqtt.html).

In the following screenshot, the marked lines show the MQTT messages sequence:


After I pushed the button for the first time. the relay went on the ON state and the system sent a MQTT message with topic tasmota/garden/light/sonoffbasic01/stat/RESULT, with content POWER: ON. This is the confirmation sent by the device; the command has been well understood. When the relay changed its state to ON, the device sent another MQTT message with topic tasmota/garden/light/sonoffbasic01/stat/POWER and value ON. Now the relay is active and the lamp is ON.

The next telemetry messages confirmed this too. The POWER variable now has the value ON.

Then I pressed the button for the second time: the relay changes its state to OFF and the system sent the following MQTT messages:
tasmota/garden/light/sonoffbasic01/stat/RESULT {POWER: OFF} and tasmota/garden/light/sonoffbasic01/stat/POWER OFF. Now the lamp is OFF.

We get the same behaviour using the TOGGLE button on the web interface.


or sending POWER ON and POWER OFF commands directly from the web console.


As last step, I powered on the lamp using the MQTT POWER ON message, using a standard MQTT client, connected to our broker.

Normally I use MQTT-SPY, a very useful java software which permits to send and receive MQTT messages.

My message must belong to the topic tasmota/garden/light/sonoffbasic01/cmnd/POWER and must have the ON value. The lamp will turn ON.


Thursday, 10 August 2017

Home Automation System - SONOFF and MQTT


Ok, it's time to get all the power of SONOFF.

Just to summarize, I've got a SONOFF Pow and a SONOFF Basic, both of them with TASMOTA firmware on board.


Using this fantastic firmware, I could control the device through serial comms, web api (http) and MQTT, a very good protocol for IoT purpose, thanks to its lightweight footprint. I spoke about MQTT in a previous post (see http://domoticsduino.blogspot.com/2017/07/home-automation-system-discovering.html)

I will use mostly the MQTT protocol; so, I have to setup SONOFFs to use it, entering the MQTT broker informations and the topics. As usual, the official Wiki pages help us (see https://github.com/arendst/Sonoff-Tasmota/wiki/MQTT-Features)

For those not able to run a local MQTT broker (Mosquitto is a good free broker), it is possible to use, only for testing purpose, some free public MQTT broker (example: Mosquitto Test Server, Hive MQ and Eclipse)

Browsing the configuration pages on the SONOFF web console, you could enter all the MQTT informations. You can open the SONOFF web console using your browser and typing the ip address in the address bar. A web page similar to the following one will be shown:


Clicking on "Configuration" ==>


We will use mainly the "Configure MQTT" option: the others are self-explained.


Here, I entered the Host (ip address or host name) and the Port (1883 is the MQTT default one) for the MQTT broker.

The Client ID field is a simple string which identifies the device on the MQTT broker. It will be better to be univocal among all the devices.

User and Password fields are used for broker authentication (highly recommended!!!)

Topic and Full Topic fields are the most important one for the MQTT protocol. Here you can find some information about them: https://github.com/arendst/Sonoff-Tasmota/wiki/MQTT-Features#mqtt-topic-definition

- Topic: normally used to identify the device; it will be part of the MQTT Full Topic. It will be better to be univocal among all the devices.

- Full Topic: is the complete topic used for MQTT messages.

Inside Full Topic, we could use two variables called %topic% and %prefix%.

%topic% will be replaced by one of the following system variables, according to the real situation: Topic, GroupTopic, ButtonTopic, SwitchTopic e MqttClient.

%prefix% identifies the type of message and could take three distinct values, corresponding to the folloing system variables: Prefix1, Prefix2 and Prefix3

- Prefix1 = cmnd, used for command messages
- Prefix2 = stat, used for status messages
- Prefix3 = tele, used for telemetry messages

When I speak about system variables, I mean a list of configurable TASMOTA properties for every device. There are so many...Here you can find the complete list: https://github.com/arendst/Sonoff-Tasmota/wiki/Commands#command-overview

Here is my SONOFF Basic configuration:


Topic = sonoffbasic01

Full Topic = tasmota/garden/light/%topic%/%prefix%/


For Topic and Full Topic I followed a naming convention, in order to understand the mean of a message, just reading its topic.

The Topic, as said before, identifies the single device; so I used the type of device followed by a progressive number. For example, the topic of the SONOFF Pow will be sonoffpow02. The same topic string will be used also as network name and mqtt client id for the device.

The naming convention for the Full Topic is: firmware/zone/type/%topic%/%prefix%/

I would like to clarify that these are not rules but only suggestions. I chose this naming convention, you could use another one. It's up to you...

The final step is to enable MQTT protocol on the device, looking for the MQTT enable flag in the Configure Other page.

Well, finally now I'm ready to test my SONOFF with MQTT.

******************************************************

A small update about a configuration error I found later

http://domoticsduino.blogspot.com/2017/08/home-automation-system-sonoff-and.html


Thursday, 3 August 2017

Home Automation System - Configuring SONOFF Basic


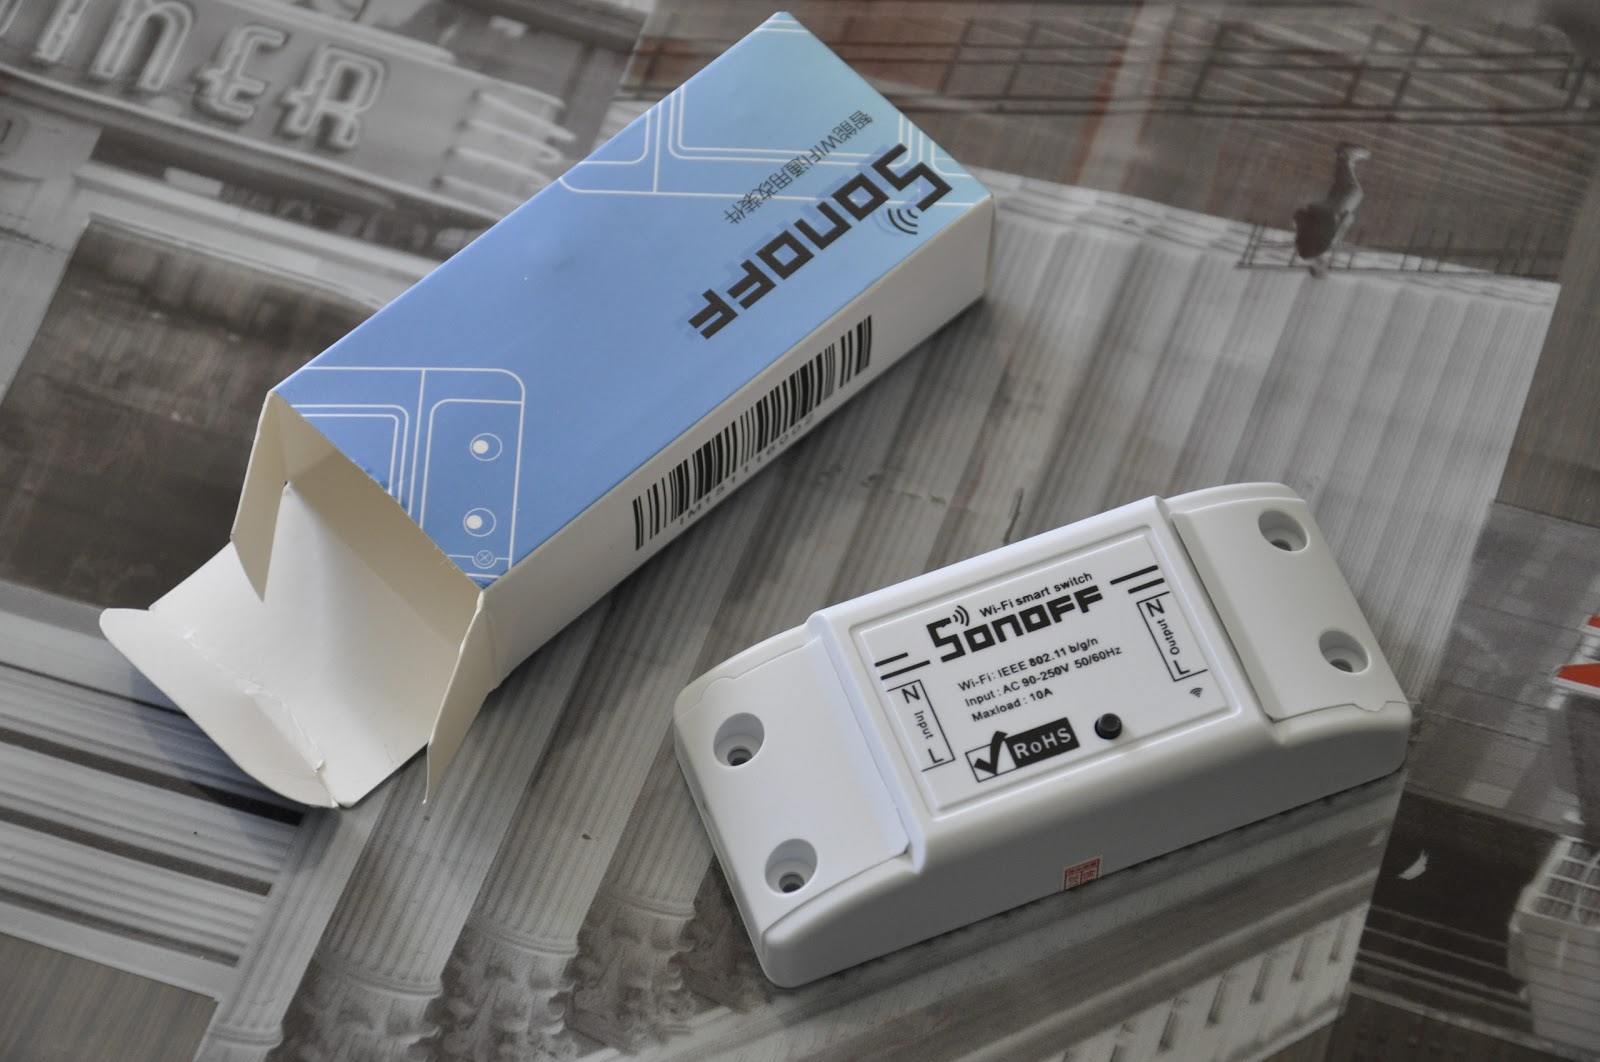
Priority to the youngest...the just arrived SONOFF Basic


The first thing to do is testing it with no modification...in this way, if the device is bad, we could return it. The procedure is the standard one, explained here.

First, plug the device to the main power; the SONOFF Basic, differently from the SONOFF Pow, has INPUT and OUTPUT terminals splitted, one on each side and has no earth connection.

I connected the INPUT side to a standard plug and the OUTPUT side to a lampholder...


I connected the plug to a wall outlet and the SONOFF turned on. Now I have to download the EWeLink App on my android tablet. During the first setup, I created a new EWeLink account. Then I followed the pairing procedure (see https://www.itead.cc/wiki/EWeLink_Introduction). The app suggested me what to do in order to add the device; the following step was to store the wifi SSID and password to join my home network; the last step was to give a name to the device. Ok, now I can take control of the device through EWeLink app.

Ok, the device is working as expected with the default firmware. Now I may update it with the TASMOTA firmware, using the same procedure as the SONOFF Pow, described in and old post (http://domoticsduino.blogspot.com/2017/07/home-automation-system-first-sonoff.html); it's important to unplug the device from the main power when connected to serial interface.

The main difference is that the serial interface is located in the middle of the device, near the button, and it has 5 PIN (not 4 as the SONOFF Pow). The PIN located far from the button is GPIO0 and it is not part of the serial interface.

Here is the USB-Serial converter, connected to the SONOFF


And here is the WiFi configuration panel, as the result of the procedure already followed for the SONOFF Pow (https://github.com/arendst/Sonoff-Tasmota/wiki/Button-Usage).


As you can see, the TASMOTA firmware let us to manage two WiFi connections; so, if the first one is not reachable or its signal is very low, the device switches to the second one, and vice versa. Very good feature...

Now, finally I will try the MQTT protocol...

Tuesday, 1 August 2017

Home Automation System - New mailbag...


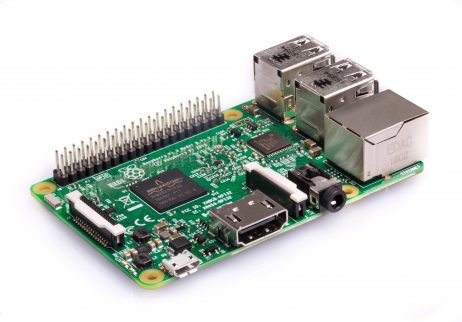
In the meantime, time passes by and a new mailbag is arrived; it contains new toys for my Home Automation System: a Basic SONOFF and a Raspberry PI 3.

The Basic SONOFF is a simple WiFi switch, as the SONOFF Pow, which we already know, but without the power measurement chip. In simple words, it's a WiFi controlled relay.


The Raspberry PI 3 is the world famous mini PC (see https://www.raspberrypi.org/products/raspberry-pi-3-model-b):

- Quad Core 1.2GHz Broadcom BCM2837 64bit CPU
- 1GB RAM
- BCM43438 wireless LAN and Bluetooth Low Energy (BLE) on board
- 40-pin extended GPIO
- 4 USB 2 ports
- 4 Pole stereo output and composite video port
- Full size HDMI


I will use it as an OpenHab v.2 server, with some addons as the MQTT broker...


I already own a Raspberry PI 2, but it's already running OSMC, a very nice Operating System which transforms PC in Media Center.

With the Raspberry PI 3 I received also a good "starter-kit": a 3A power supply , a transparent case and some heatsinks (see https://www.amazon.it/dp/B01DDFFOYK/ref=cm_sw_r_cp_dp_T2_UUqGzb73MSE2T)

In the next posts, I will write some words about the Raspberry PI 3 and OpenHab v.2 setup